OAuth 2.0 Authorization (Magic xpi 4.7)
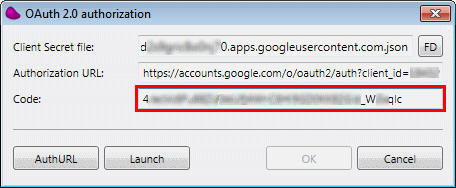
The OAuth 2.0 Authorization dialog box opens when you click the OAuth 2.0 button in the Google Resource Setting window. This dialog box contains the following properties:
|
|
|
|
Client Secret File
|
Click  and select the client_secret .json file that you obtained from the Google Developers Console (see Configuring the OAuth 2.0 Authorization Flow section below). and select the client_secret .json file that you obtained from the Google Developers Console (see Configuring the OAuth 2.0 Authorization Flow section below).
|
|
Authorization URL
|
A copyable read-only field containing the authorization URL that was obtained when you clicked the Get Auth URL button (below).
|
|
Code
|
Paste the code that you received from Google into this field.
|
The OAuth 2.0 Authorization dialog box has the following buttons:
|
|
|
|
AuthURL
|
Obtains the authorization URL. This button is enabled only when the Client Secret File field (above) has been defined.
|
|
Launch
|
Launches the authorization URL in an external browser. This button is enabled only when the Authorization URL field (above) is populated.
|
Each request sent to Google must be identified with an appropriate API. Therefore, you must enable the APIs on the Magic xpi side (the client side) as well as on the Google side (the server side).
-
In the Settings dialog box's Resources section, create a new Google resource. Click the APIs button to open the APIs list, select at least one API from the list, and then click OK.
-
Then, create your client ID by performing the following steps in the Google Developers Console:
-
Go to the Google Developers Console (https://console.developers.google.com/) and log in with your Calendar user credentials.
-
Create a new project. For this example, you can call it magic xpi.
-
Under the project that you have just created, click  in the top left to open the sidebar.
-
In the sidebar, click API Manager.
-
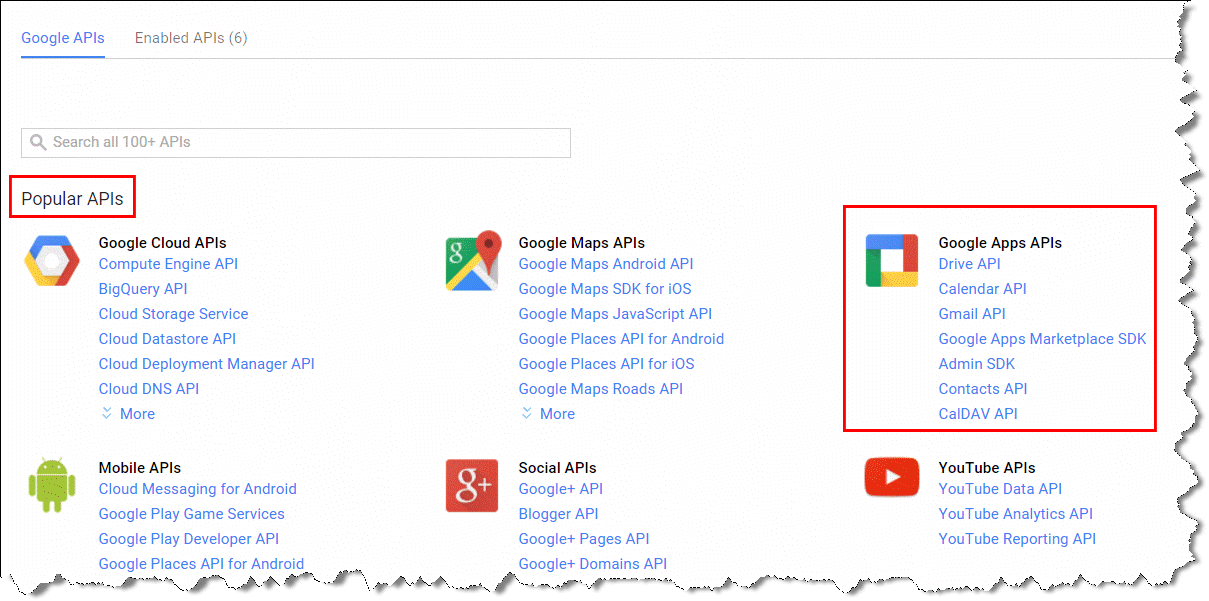
In the Popular APIs screen, locate the Google Apps APIs section.
-
-
In the Google Apps APIs section, click either Drive API or Calendar API, depending on which API you are using.
-
Then, click Enable API.
-
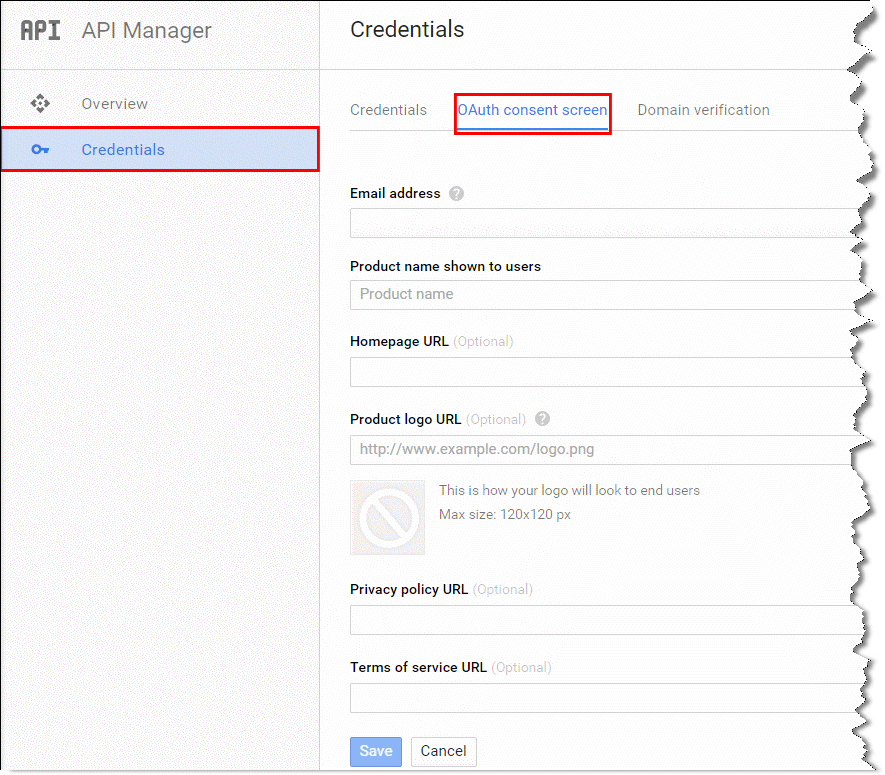
In the sidebar on the left, click Credentials. At the top of the Credentials screen, click the OAuth consent screen tab.
-
-
In the Email address parameter, select your email. In the Product name shown to users parameter, enter Magic xpi. The name does not have to be Magic xpi, but this will be the name that appears on the consent page. The other fields are optional.
-
Click Save.
-
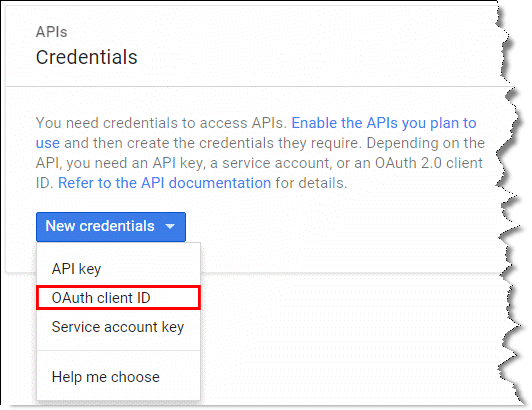
Next, you need to create a client ID. If the Credentials tab did not open automatically when you clicked Save (above), you should click Credentials in the sidebar on the left.
-
In the Credentials screen's Credentials tab, select OAuth client ID from the New credentials drop-down list.
-
-
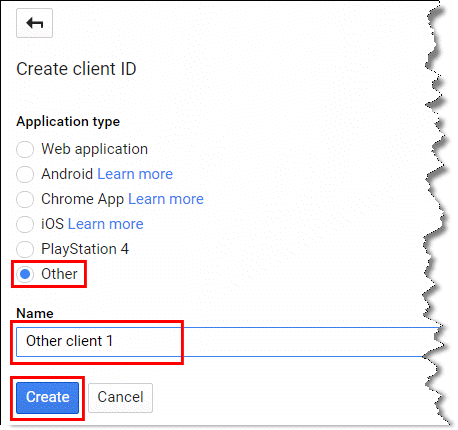
In the Create client ID screen's Application type section, select Other, and enter the required name.
-
-
Click Create to create your client ID.
-
-
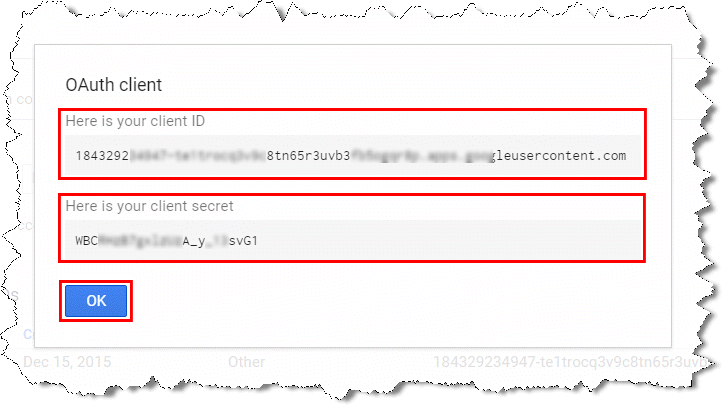
Once you have created the client ID, click OK.
-
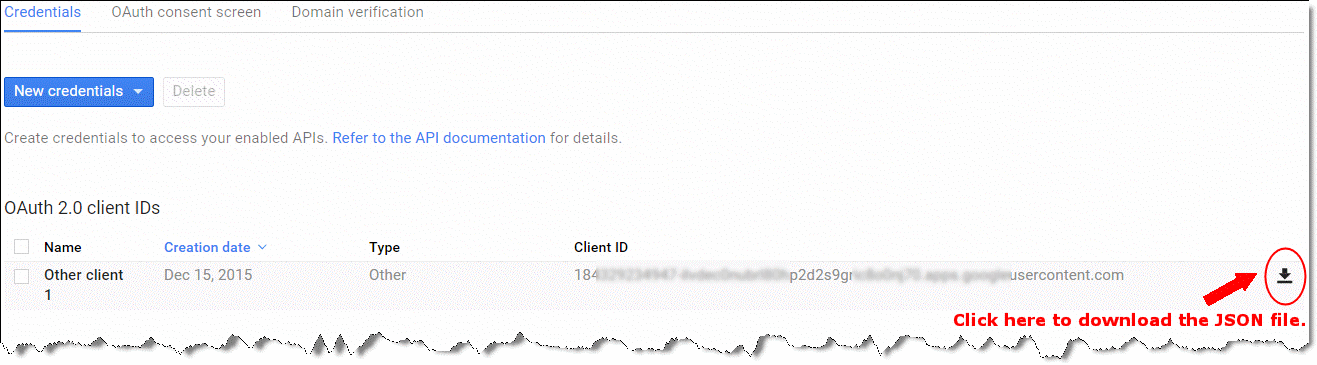
Then, click the Download JSON button and to save the newly created .json file on your machine.
-
Next, perform the following steps in Magic xpi:
-
In the Google resource that you created earlier, click the OAuth button to open the OAuth 2.0 Authorization dialog box.
-
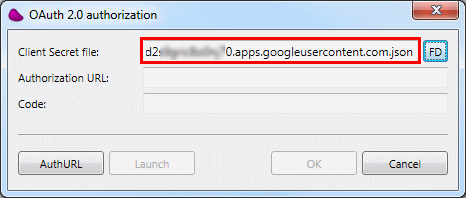
In the OAuth 2.0 Authorization dialog box, select the .json file that you downloaded from the Google Developers Console.
-
-
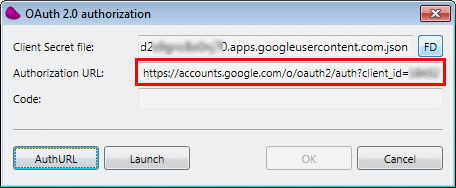
Click the Auth URL button. A value will appear in the Authorization URL parameter.
-
-
Either click the OAuth 2.0 Authorization dialog box's Launch button to open the URL in your default browser, or copy the URL from the Authorization URL parameter to the browser of your choice.
-
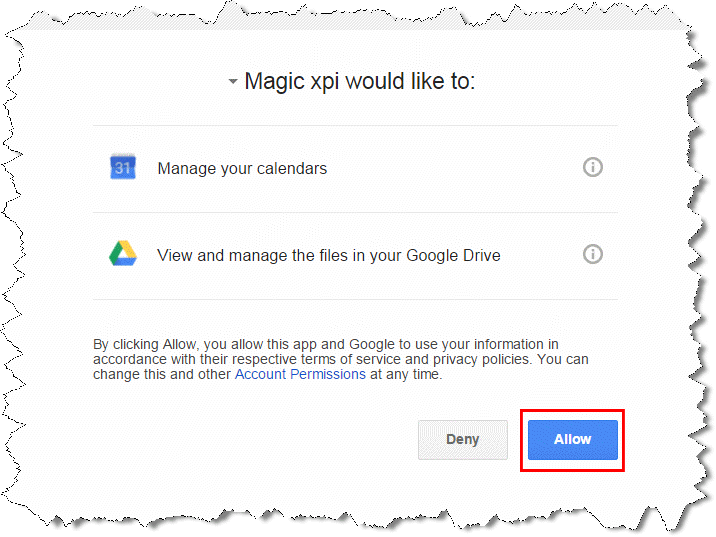
If you are logged into your Google account, you will then be redirected to a consent page. If you are not already logged in, you need to enter your login details to get to the consent page. This page displays the application name that you defined previously in the Google Developers Console.
-
Click the Allow button to give permission to access your Google Calendar and/or Google Drive.
-
-
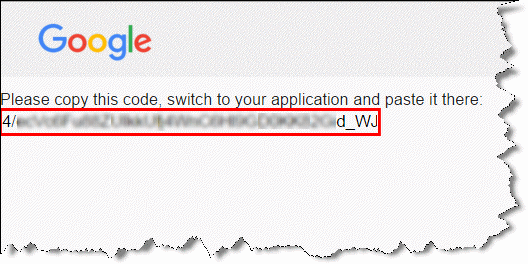
You will then be redirected to a page containing a code. Copy this code and return to the Magic xpi Google resource.
-
-
Paste the code in the OAuth 2.0 Authorization dialog box's Code parameter and click OK.
-
-
If no error is received at this point, the OAuth 2.0 Authorization dialog box will close. If an error occurs, click here for information about how to resolve it.
-
Click the Google resource's Validate button to verify that the process was successful.
