Manual Installation of the Systinet Server for Java (Magic xpa 3.x)
This Technical Note describes the procedure for manually installing the Systinet Server for Java and how to configure it to interact with Magic xpa.
There are some machines on which the Magic xpa installer fails to install Systinet due to configuration problem. This technical note will guide you through the prerequisites and the verification and installation procedure.
-
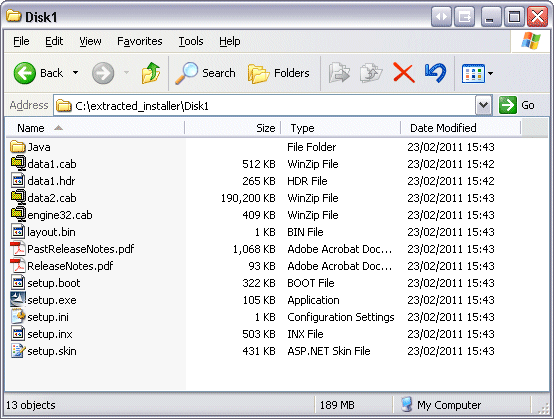
Extract the necessary files from the Magic xpa installation file (found on the CD or on our downloads site), using the following command line:
EXE_NAME /extract_all:PATH_TO_DIRECTORY

A directory named Disk1 will be created with the extracted installation.
-
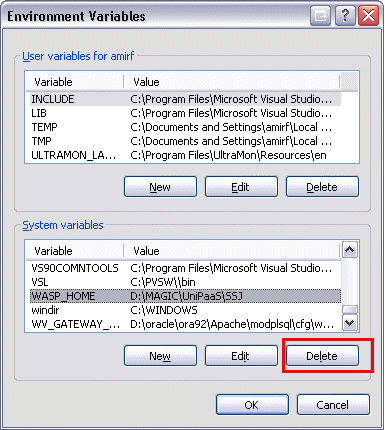
Make sure that the WASP_HOME environment variable is not defined.
Verify this by using the SET_WASP_HOME CMD command:

This variable, if it exists, can be removed by following this file path, and clicking Delete:
My Computer > Properties > Advanced Tab > Environment Variables
-
Make sure that you have a valid installation of Java on the machine. The Systinet Server is Java-based, and requires a Java installation of Version 1.6 (for the Systinet 6.6 installation) or Java 1.5 (for the Systinet 6.5.2 installation). This can be tested by typing Java –version in the command line, as shown below.

The Java –version command shows the Java installation version of the java.exe file that is located in the path mentioned in the PATH environment variable.
For example, the Java.exe file is completed by the PATH environment variable …..;F:\magic\ Java\bin;…….
This means that the Java.exe file has the following file path: F:\magic\Java\Bin\Java.exe
The possible types of installations are:
-
JRE – Java Runtime Environment, which is required for the Magic xpa runtime engine.
-
JDK – Java Development Kit, which is required to generate client modules or provider modules. This type of installation also includes JRE as described above. JDK is mandatory for the development stage only.
The installers can be downloaded from: http://java.sun.com/javase/downloads/index.jsp
The Java installers can also be found at Disk1\Java.
-
To verify which version is installed and which one is configured, make sure that the JAVA_HOME environment variable matches the following registry entry:
HKEY_LOCAL_MACHINE\SOFTWARE\JavaSoft
Make sure that the PATH environment variable has a path to the Java.exe file located under the JDK installation.
-
To ensure that the JAVA_HOME variable points to the correct place, use the set java_home command line (as shown below):
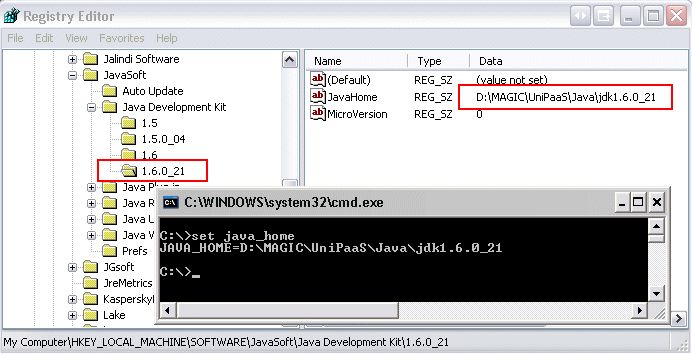
The entry named Java runtime environment can have a different JAVA_HOME value.
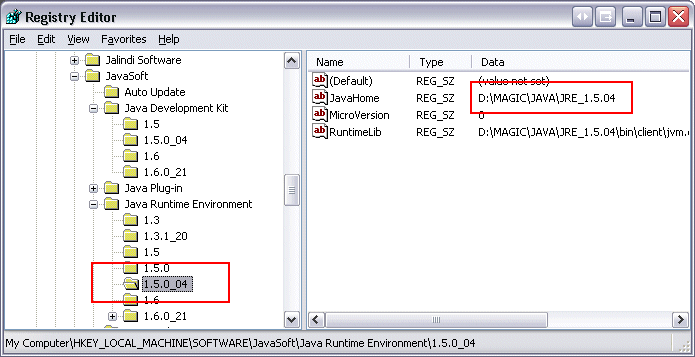
If the JAVA_HOME and/or the PATH environment variable points to the JRE installation (since it was installed last), generating Web services through Magic xpa causes a Java NoClassDefFound error.
-
Install Magic xpa without selecting the Web Services Framework. Please note that by default this component is selected, so it needs to be un-checked.
-
Manually install Systinet by entering the following command line: java -jar wso2-soa-enablement-server-java-6.6.jar.
Note that the wso2-soa-enablement-server-java-6.6.jar file is located in the extracted directory under Disk1\Java.
This file is the installer of Systinet 6.6 (as of V1.9g).
For older versions, the file is named: systinet-server-java-6.5.2.jar.
Systinet 6.5.2 uses Java 1.5 (and does not support working with Java 1.6).
-
Select the Install Security Support option, as shown below:
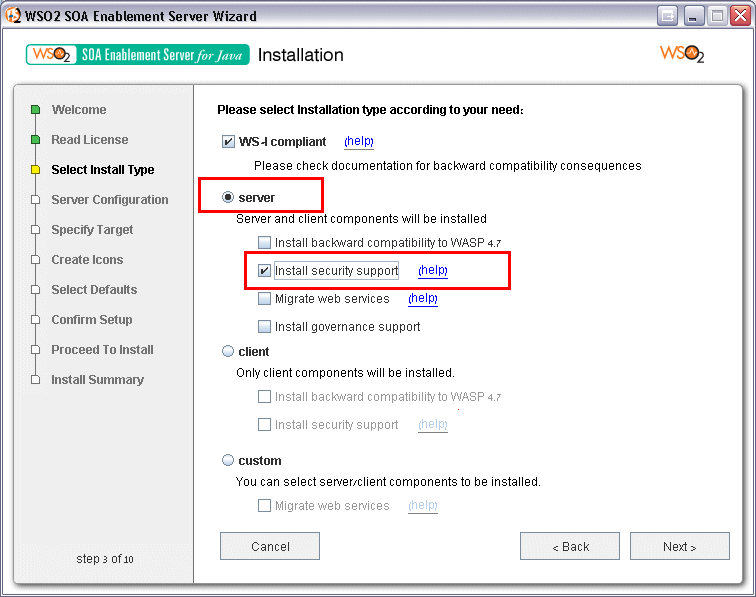
After step 3 of the installation, use the defaults by clicking Next.
-
Set the WASP_HOME environment variable to the location of the new Systinet installation, by following this file path:
My Computer > Properties > Advanced Tab > Environment Variables
Make sure that it is defined as a system variable rather than as a user variable.
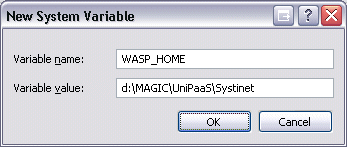
The following screen shows the expected outcome (you may need to restart your machine):
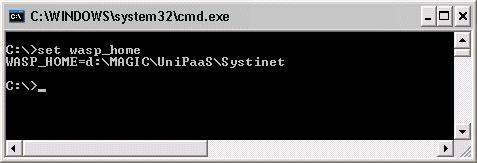
-
Copy the Magic xpa JAR files. These files are available in the Support directory, under the Magic xpa installation directory (since version: eDeveloper V10.1 SP3). These files should be placed in the %WASP_HOME%\lib directory:
-
MgSSJ.jar
-
MgRequester.jar
-
saaj_utils.jar
-
Edit the %WASP_HOME%\bin\Server.bat file. This is mandatory for the provision of Web services. The following two changes are needed:
-
Add the following line:
Set WASP_CLASSPATH= %WASP_HOME%\lib\MgSSJ.jar;%WASP_HOME%\lib\MgRequester.jar;%WASP_HOME%\lib\saaj_utils.jar;%WASP_CLASSPATH%
Place it after the line starting with CALL and before the one starting with SET PARAMS as shown below:
CALL " D:\MAGIC\Magic xpa\Systinet\bin\env.bat"
Set WASP_CLASSPATH= %WASP_HOME%\lib\MgSSJ.jar;%WASP_HOME%\lib\MgRequester.jar;%WASP_HOME%\lib\saaj_utils.jar;%WASP_CLASSPATH%
SET PARAMS=%*
-
Add the following line (including the quotation marks):
"-Djava.library.path=Path to Magic xpa root directory"
-
Create the Systinet Server's service:
This section is not mandatory. The server can be invoked by entering the following:
%wasp_home%\bin\StartService.bat
Modify the %WASP_HOME%\bin\InstallService.bat script as follows:
-
Replace the CALL env.bat line with the following lines:
set JAVA_HOME=The JAVA_HOME value
set WASP_HOME=The WASP_HOME value
set JAVA_CMD= The JAVA_HOME value\bin\java
set BUILD_FILE=build-default.xml
-
-
Change the following line:
"-Djava.class.path=%WASP_HOME%\lib\wasp.jar;%CLASSPATH%"
To:
"-Djava.class.path= %WASP_HOME%\lib\wasp.jar;%WASP_HOME%\lib\Mgssj.jar;%WASP_HOME%\lib\MgRequester.jar;%WASP_HOME%\lib\saaj_utils.jar;%CLASSPATH%"
-
-
Add the following line:
"-Djava.library.path=Full path to the Magic xpa Scripts directory"
Immediately after:
"-Dlog4j.configuration=%WASP_HOME%\conf\log4j_NTservice.config"
-
-
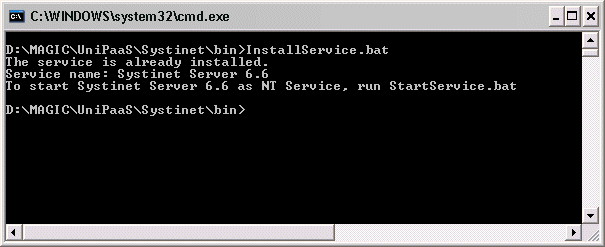
Save and run the script. (You can change the service name by altering the set NT_SERVICE_NAME=… line.)
-
Testing the Provider Side:
-
-
Create and deploy a Web service via Magic xpa.
-
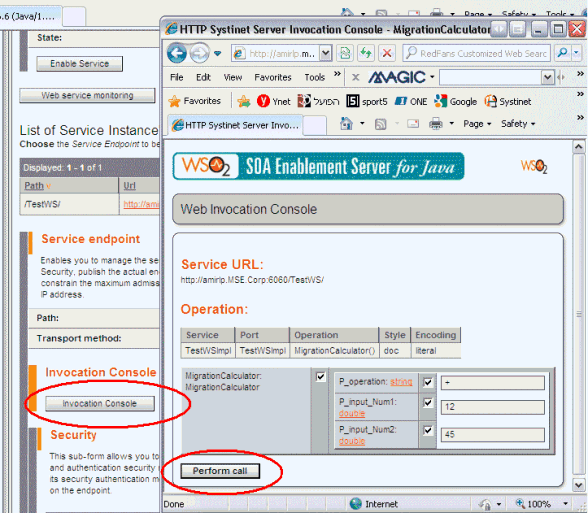
Invoke the Web service from the Web Invocation Console of the Systinet Server, as shown below.
-
Testing the Consumer Side:
-
